


Photo Wall - Acrylic Tiles

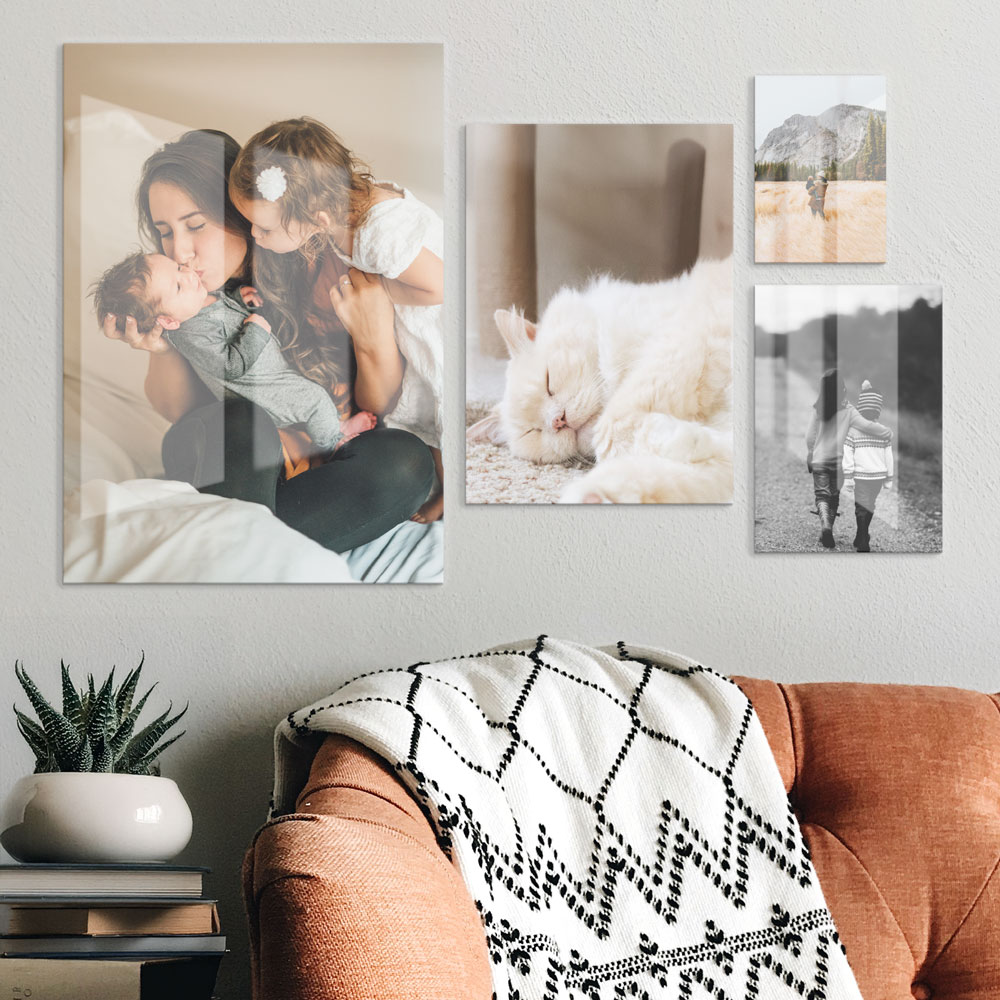
Turn any blank wall into a vibrant picture wall with our Premium Acrylic Photo Tiles. Your custom wall art masterpiece will have a sleek, glossy finish and will be perfectly aligned with the use of our Photo Wall Spacer. Not just limited to photos! Complement your photo memories with artwork from our Art Library. Easily remove and reposition many times over without damaging your walls. Photo Wall Tiles - packed with features.
A Sleek, Glossy Finish
Made from durable, high-quality acrylic, our shiny new tiles have a bright, glossy finish that makes your photos really pop. It even comes with a handy protective layer to keep it safe from bumps and scratches until it’s ready for its big moment on the wall! Think bold finishes, crisp details on super-sleek acrylic that catches the light just right. It’s time to turn your special memories into a mini gallery masterpiece!
Choose From Various Shapes & Sizes
Have your pick of Portrait, Landscape, Square, Hexagon, and Circle. Select from various sizes for each shape ranging from Extra Small (XS) to Extra Large (XL). Click below for more information regarding sizing for each shape.
PORTRAIT
Sizes shown indicate width x height of each Portrait Photo Sticker/Tile
S 105 x 150mm - M 150 x 214mm
L 214 x 304mm - XL 304 x 432mm
S 105 x 150mm - M 150 x 214mm - L 214 x 304mm - XL 304 x 432mm
LANDSCAPE
Sizes shown indicate width x height of each Landscape Photo Sticker/Tile
S 150 x 105mm - M 214 x 150mm
L 304 x 214mm - XL 432 x 304mm
S 150 x 105mm - M 214 x 150mm - L 304 x 214mm - XL 432 x 304mm

SQUARE
Sizes shown indicate width & height of each Square Photo Wall Sticker/Tile
XS 71mm - S 99mm - M 142mm
L 215mm - XL 301mm
XS 71mm - S 99mm - M 142mm - L 215mm - XL 301mm
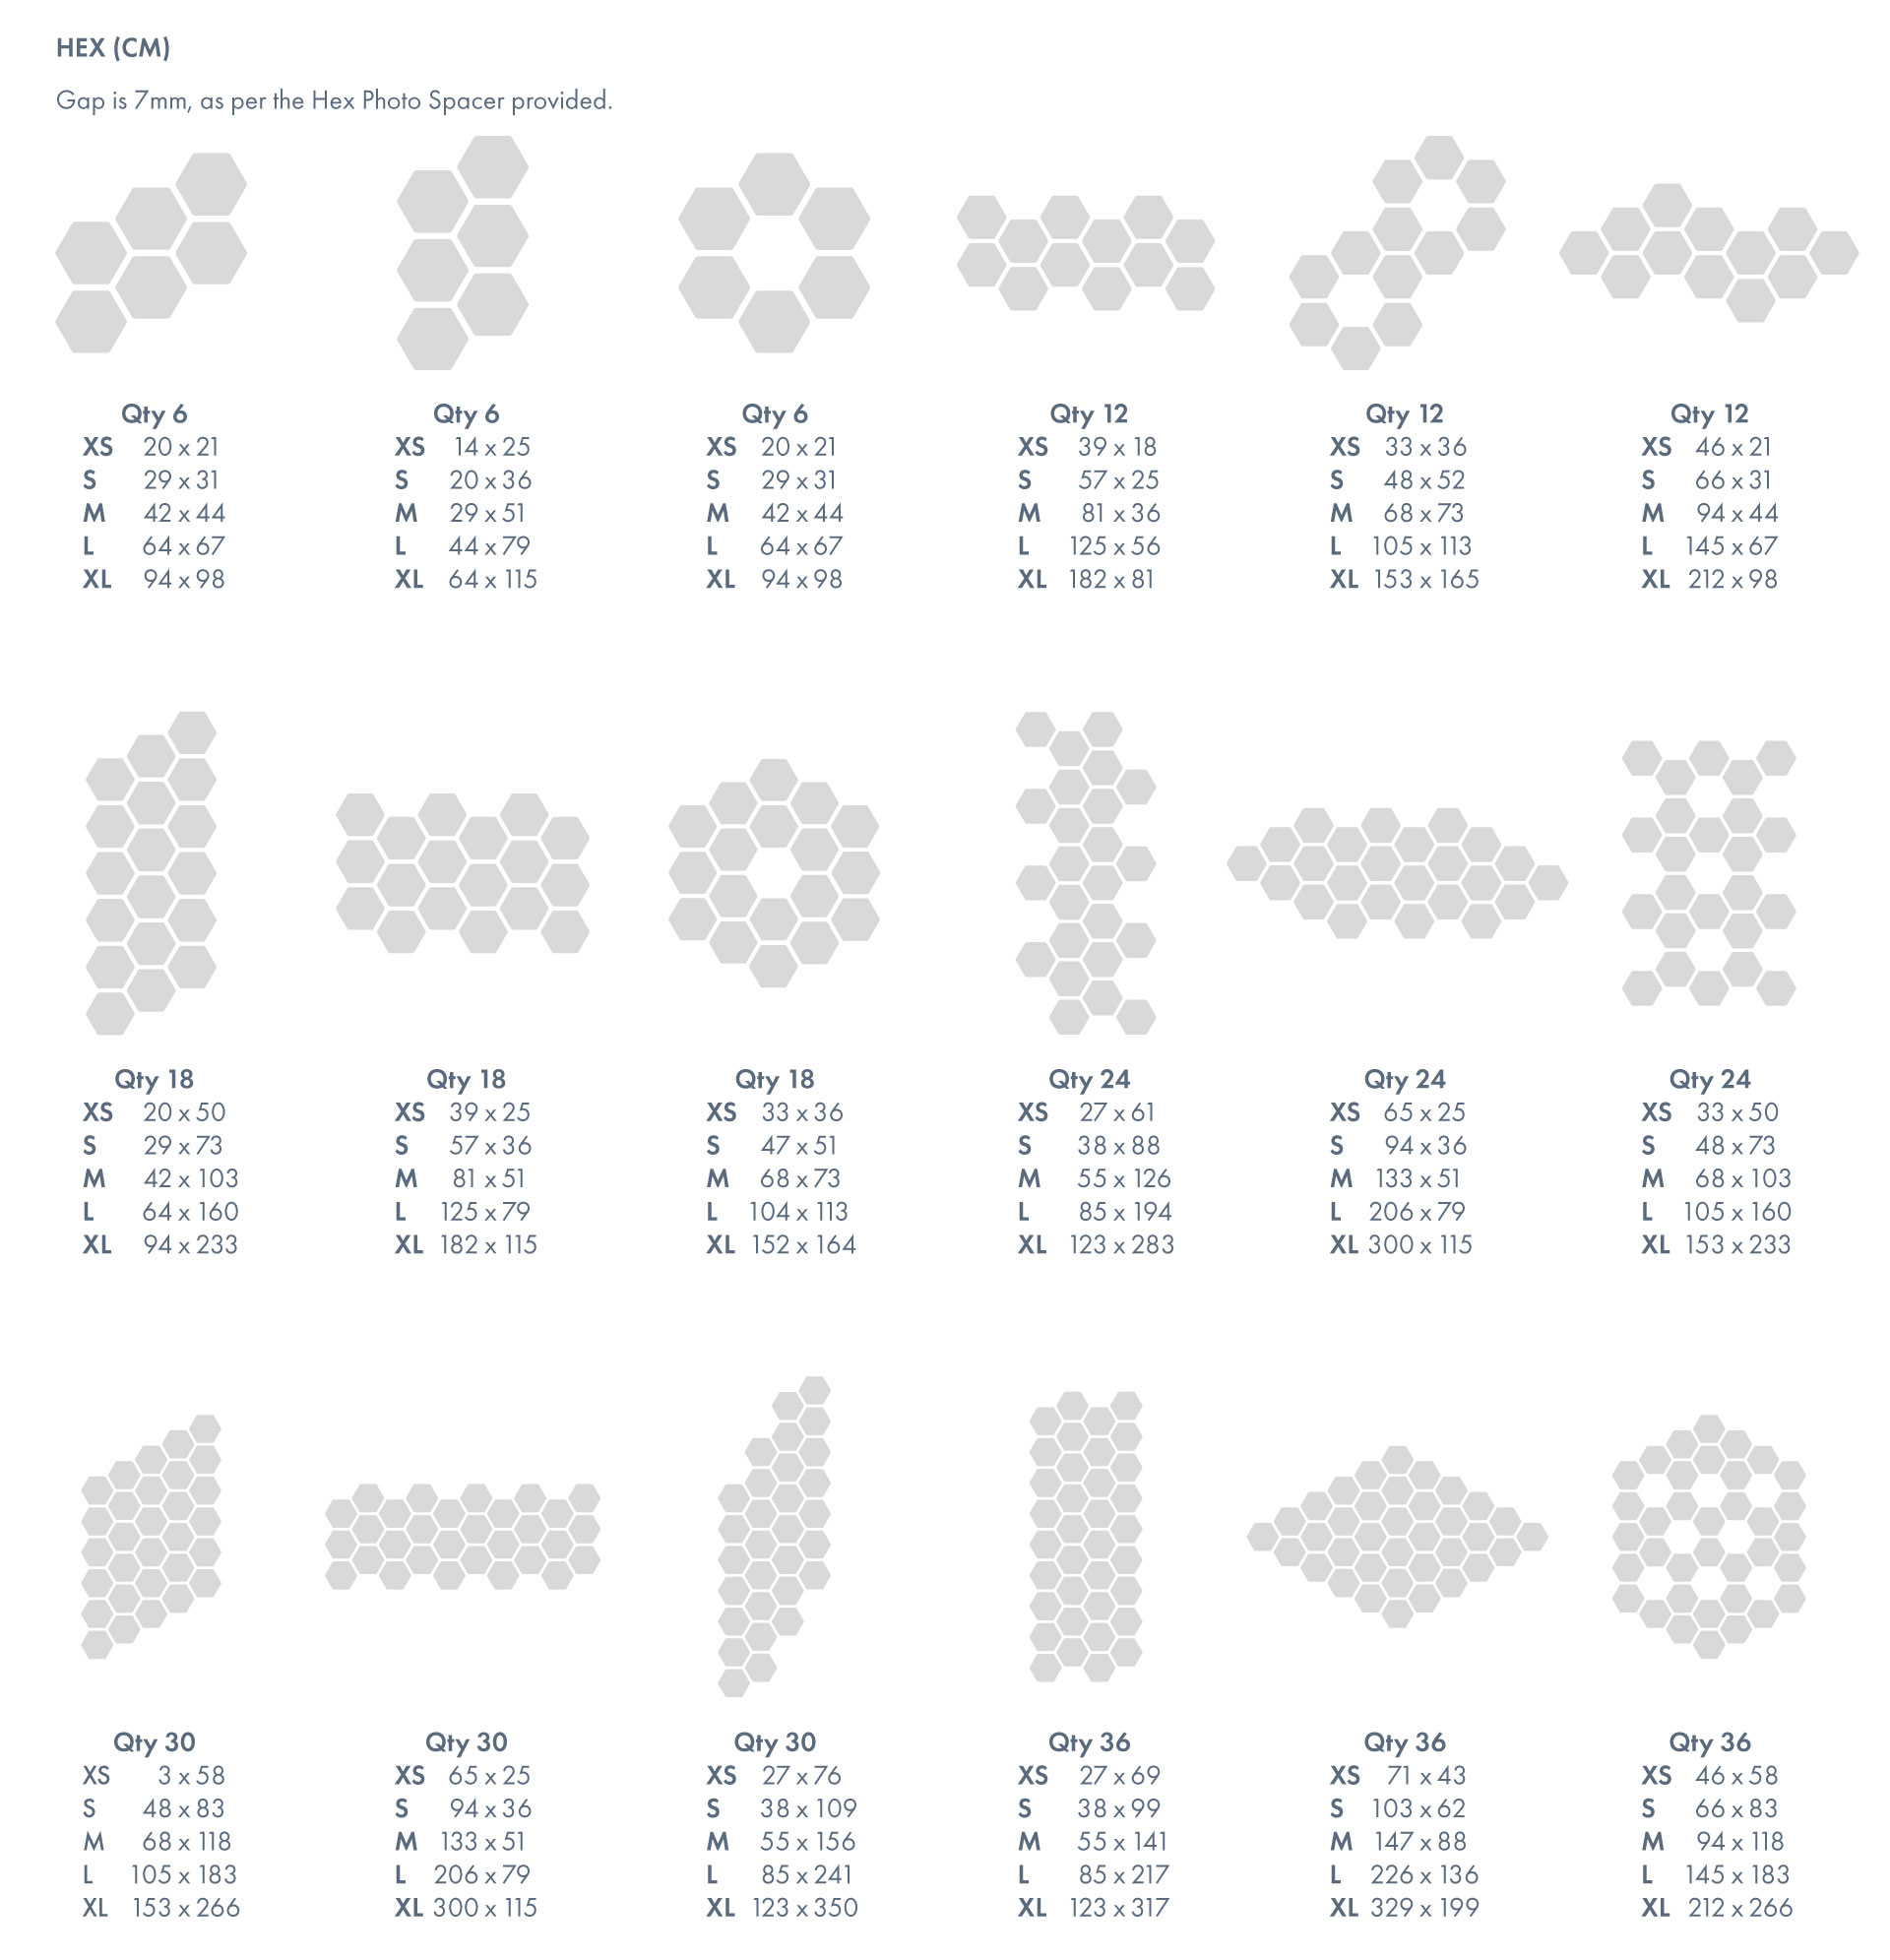
HEX
Sizes shown indicate width x height of each Hexagon Photo Sticker/Tile
M 157 x 135mm
L 242 x 209mm - XL 352 x 304mm
L 242 x 209mm - XL 352 x 304mm

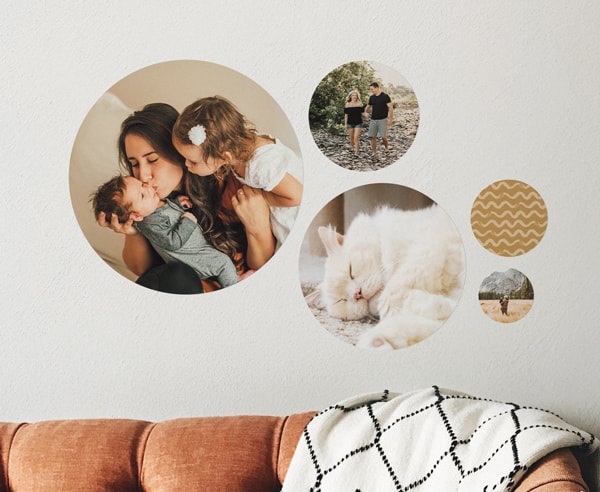
CIRCLE
Sizes shown indicate diameter of each Circle Photo Sticker/Tile
XS 71mm - S 99mm - M 142mm
L 215mm - XL 301mm
XS 71mm - S 99mm - M 142mm - L 215mm - XL 301mm
No Wall Damage
No nails, no holes in walls, no sticky residue, no stains! Our Photo Wall Tiles are mounted with a foam tape. This allows you to easily and effortlessly move, remove, reposition, and swap out your tiles without worrying about them leaving marks on your wall!
Hassle Free Set Up
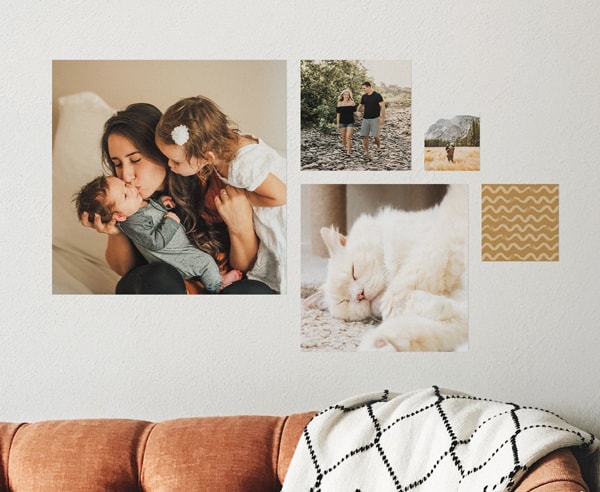
Mix Our Artwork With Your Photos
Mix in artwork, quotes, numbers, letters, patterns and more! Our Art Library has a collection of pre-made designs created to help complement your photos and your overall photo wall gallery.
Get Inspired by Creative Layouts
Your Wall. Your Way. Create a unique photo gallery wall layout that suits your style. Get inspired! Click below to view some photo wall layout suggestions.
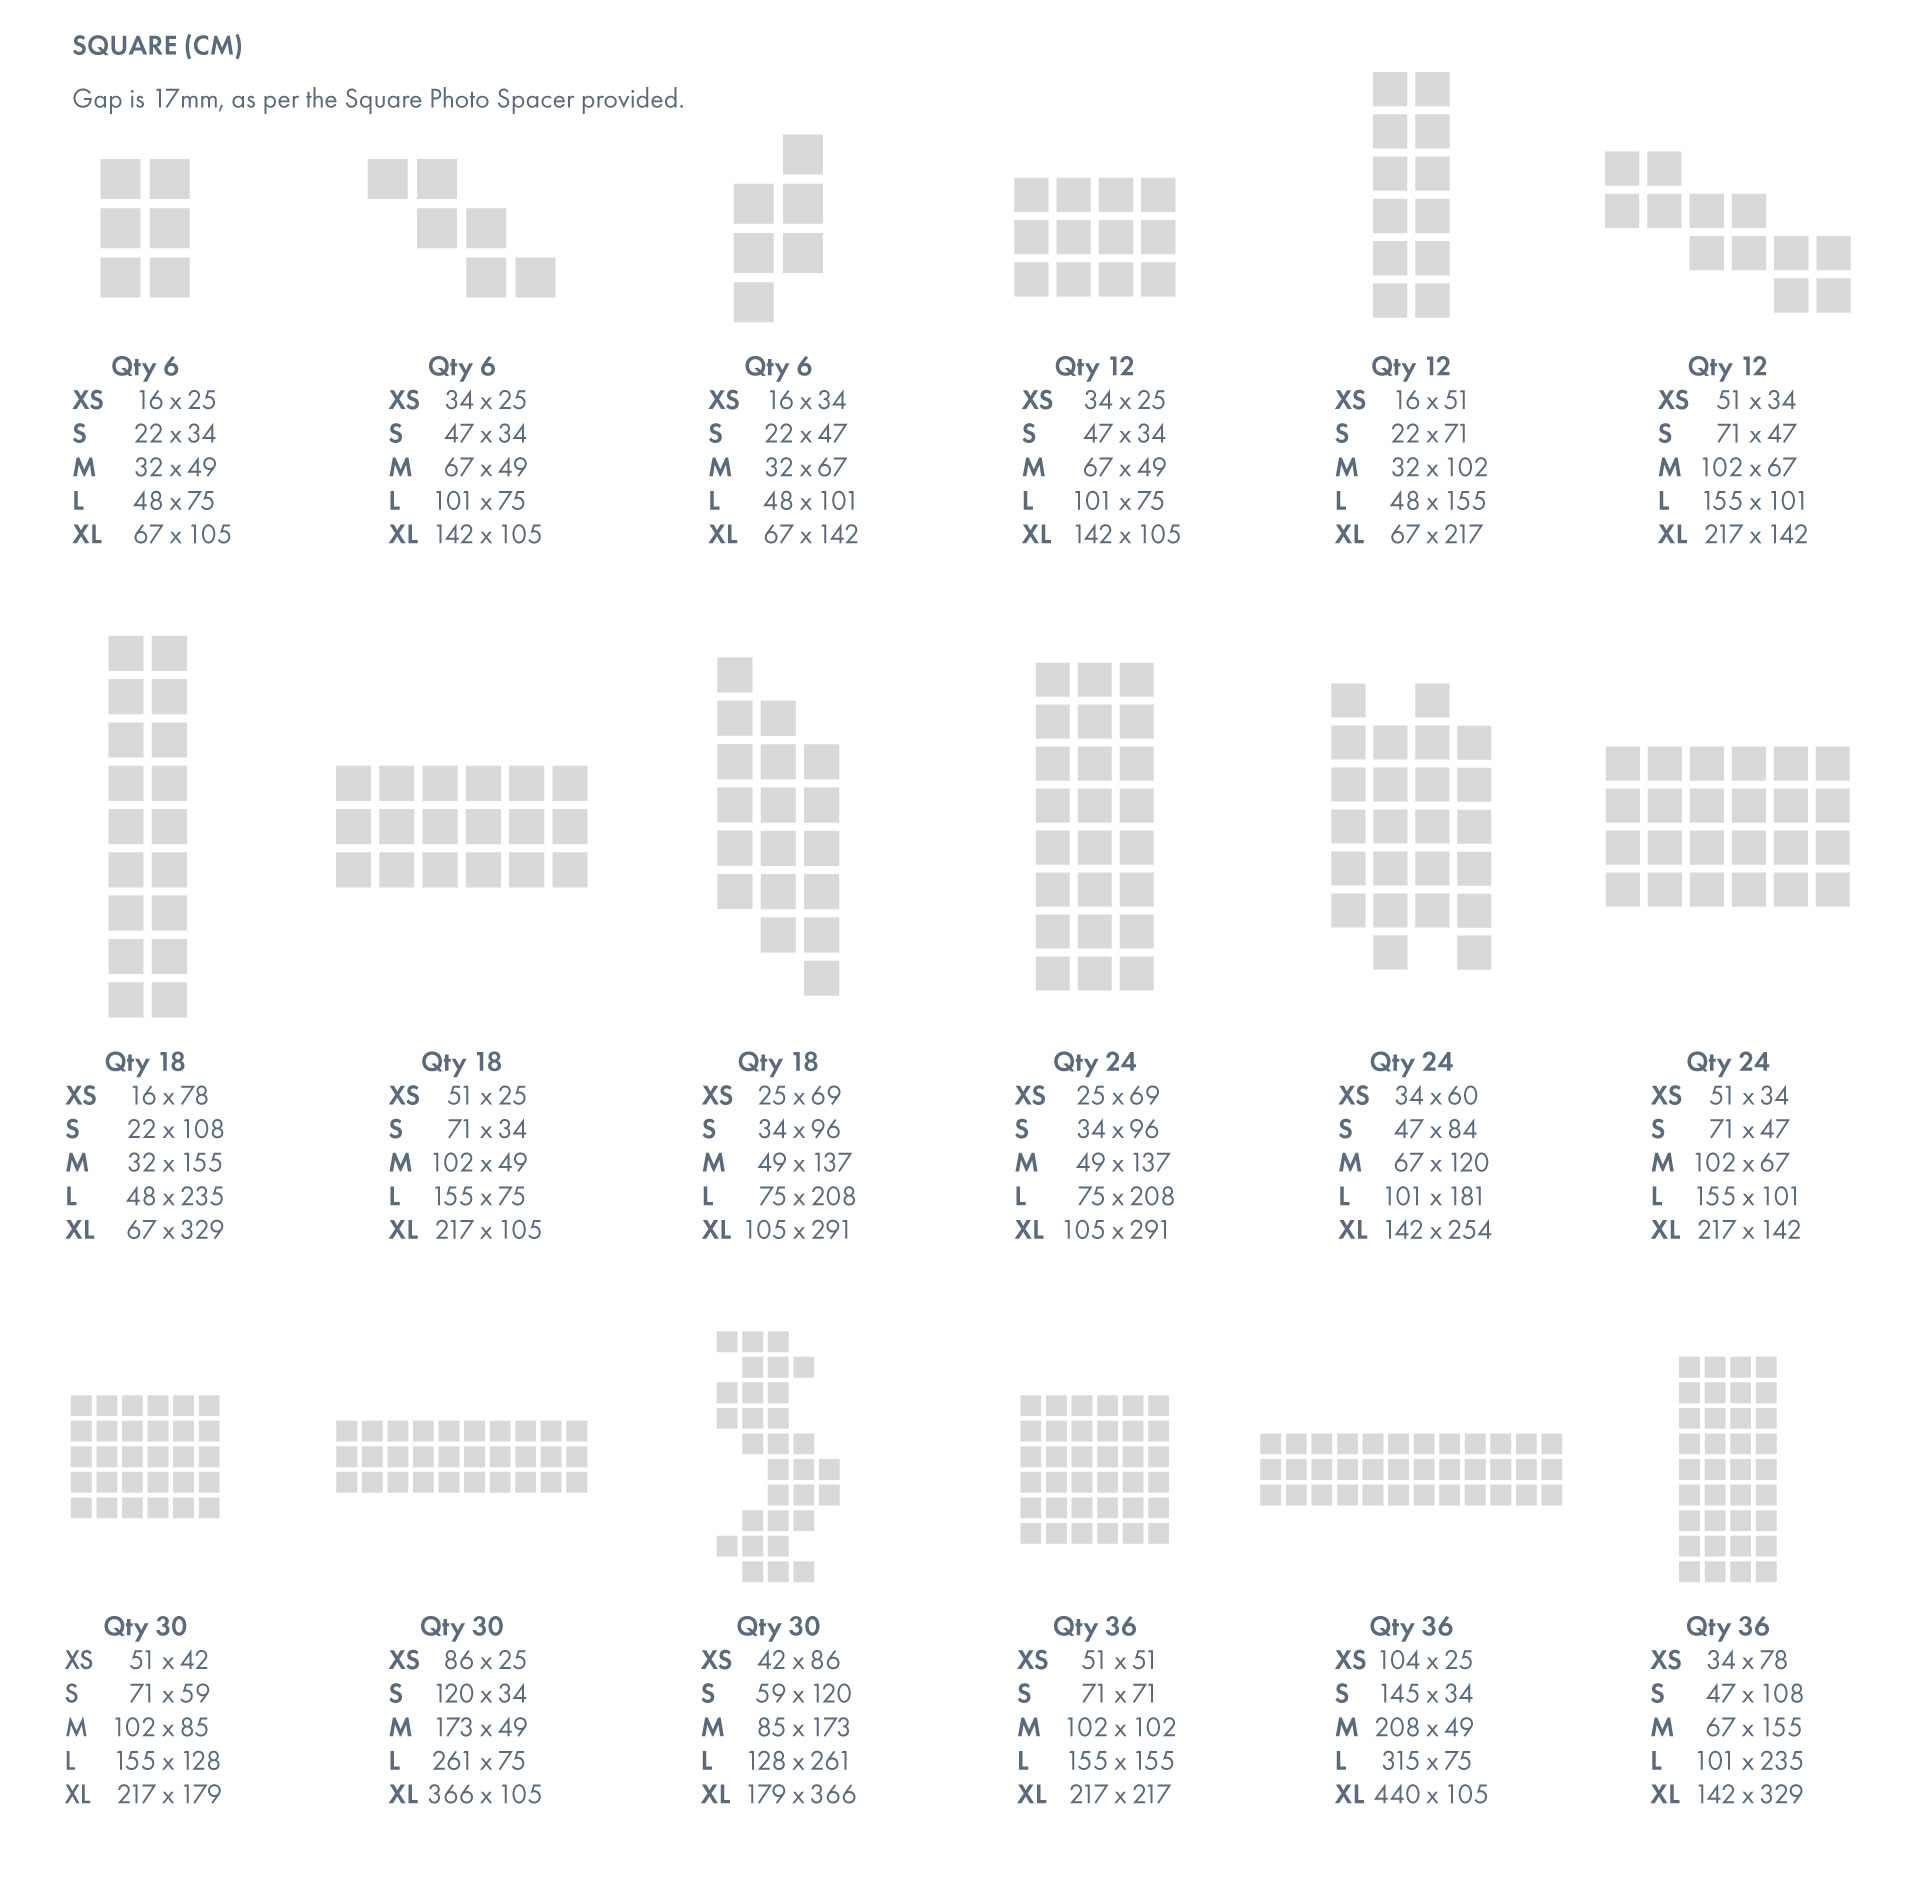


Mix in Larger Sizes
Our Square Photowall sizes are made to play nicely together using the included Spacer. Just team up Square Small (S) with Large (L), or Medium (M) with Extra Large (XL), and you’ll get a perfectly aligned, custom photo wall every time.
You can also mix sizes in our other shapes too — they just aren’t designed to line up perfectly with the Spacer. But hey, mismatched can look pretty cute too!
Made to Last
Login and Registration Form